Table of Contents
ToggleThe backsplash often gets overlooked in kitchen planning, but it’s one of the highest-impact surfaces you’ll tackle. It’s visible from multiple angles, takes the brunt of splashes and splatters, and sets the tone for your entire kitchen aesthetic. Whether you’re renovating or refreshing your current setup, the right backsplash can tie your design together, protect your walls, and add personality without requiring a full kitchen overhaul. From timeless subway tile to bold statement-making patterns, today’s options work with virtually any budget and skill level. Let’s explore backsplash ideas that work for real kitchens, practical, durable, and genuinely appealing.
Key Takeaways
- Kitchen backsplash ideas range from timeless subway tile to bold statement patterns, offering durability and design impact for virtually any budget.
- Classic options like subway tile and large-format tiles are affordable and practical, while matte finishes hide water spots better than glossy alternatives.
- Modern minimalist designs favor seamless large-format tiles or monochromatic approaches, with glass tile adding contemporary style through light reflection.
- Budget-friendly solutions include peel-and-stick tiles, standard ceramic subway tile at $5–$15 per square foot, and hybrid approaches focusing tile only on high-splash zones.
- Proper wall prep, including leveling and using chalk lines, is essential for DIY backsplash installation; beginners should start with mastic adhesive and small grout lines.
- Match your backsplash to kitchen lifestyle: high-moisture areas need sealed materials, dark colors hide stains, and complementary colors to cabinets and counters ensure cohesive design.
Classic Tile Backsplash Options
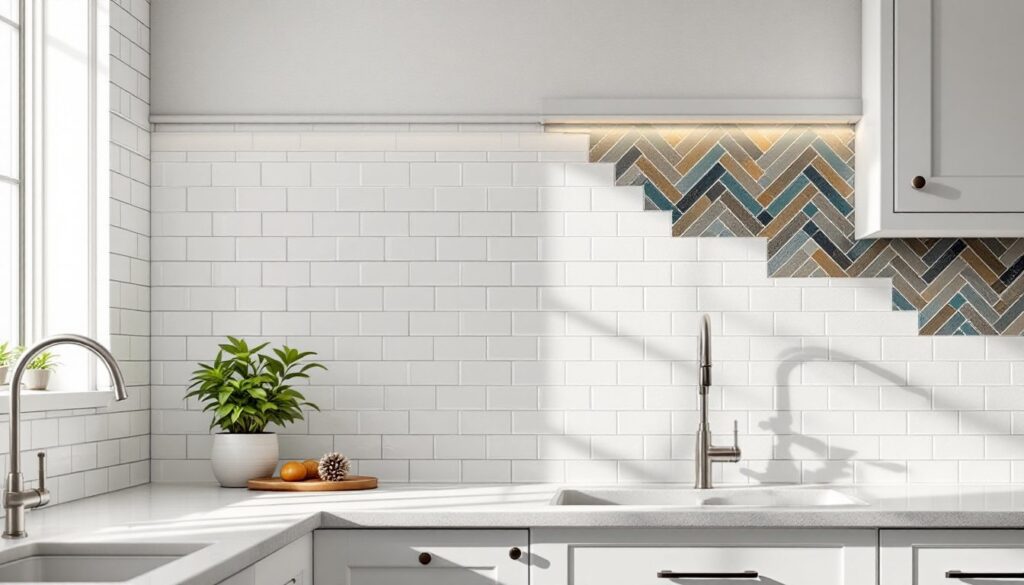
Subway tile remains king for good reason: it’s affordable, easy to install, and never feels dated. The standard 3-inch-by-6-inch white ceramic tile with contrasting grout lines gives a clean, timeless look that adapts to farmhouse, contemporary, or transitional kitchens. If you want depth without drastically changing the vibe, try a herringbone or running bond pattern, these simple layout variations feel elevated without complexity.
Hexagon tiles, penny rounds, and large-format rectangular tiles offer alternatives that still feel classic. Larger tiles mean fewer grout lines to maintain, which appeals to homeowners tired of cleaning. Just know that bigger tiles require flatter wall prep: any dips in the substrate show through. Matte finishes are trending over glossy because they hide water spots and fingerprints better, a practical win for busy kitchens.
Colorwise, warm whites, soft grays, and subtle earth tones work across decades of design trends. If you want to go darker, navy or charcoal subway tile reads sophisticated and hides backsplash grime remarkably well. Pairing light tile with dark grout (or vice versa) adds contrast and visual interest without feeling fussy.
Modern and Minimalist Designs
Modern kitchens often lean toward large-format tile, solid slabs of stone (like honed marble or quartzite), or even finished drywall. A single continuous slab removes grout lines entirely, maintenance dream, installation challenge. Large-format porcelain tiles (think 12-inch-by-24-inch or larger) give a seamless, expensive look at a fraction of the cost, though they demand a perfectly flat substrate and skilled installation.
Minimalist also means going minimal, or monochromatic. A backsplash in the exact same color as your wall essentially disappears, letting cabinetry and countertops dominate. If you prefer subtle texture, large-format neutral tiles with a matte finish achieve the look without visual noise. Stainless steel or concrete-look tiles work beautifully in industrial-modern kitchens, pairing well with white shaker cabinets or sleek, handleless European-style cabinetry.
Glass tile edges closer to contemporary than traditional. Frosted or colored glass offers color without pattern, and it catches light in interesting ways. Full-height backsplashes, running from countertop to cabinets or even ceiling, emphasize verticality and create a gallery-like effect. This works especially well in smaller kitchens where you need to draw the eye upward.
Budget-Friendly Backsplash Solutions
You don’t need to spend hundreds per square foot to get a stunning backsplash. Standard subway tile costs $5 to $15 per square foot before labor: paired with basic white or neutral grout, it’s an accessible entry point. Peel-and-stick backsplash tiles (vinyl or adhesive-backed faux tile) cost even less and require zero installation skills, though they lack durability for a long-term solution, think of them as a renter-friendly refresh or temporary upgrade.
Ceramics beat glass and natural stone on price every time. Glossy finishes cost less than matte. Basic rectangular or square shapes run cheaper than specialty cuts like bevels or hexagons. If you want pattern, mosaic sheets (small tiles already mounted on a mesh backing for quick installation) offer visual interest without custom layout labor.
Smart budget moves: buy standard-size tile in bulk, negotiate installation labor upfront, and consider doing a smaller backsplash (say, 18 inches high instead of full-height) to reduce material and labor costs. Paint the wall above with high-gloss or semi-gloss paint, it’s wipeable and feels intentional. Another angle: focus backsplash tile where splashing actually happens (sink and stove areas) and use paint or simple alternatives elsewhere. This hybrid approach saves money while protecting the zones that matter most.
Statement Backsplash Ideas for Bold Homeowners
If your kitchen needs personality, the backsplash is prime real estate. Hand-painted tiles, bold geometric patterns, or jewel-toned colors command attention and reflect your style. Moroccan zellige tile, Portuguese azulejo, or Spanish talavera tiles bring worldly, artistic flair, each piece is slightly unique, giving handmade character that factory tile can’t match.
Pattern mixing works if done intentionally: combine solid subway tile with a decorative border, or use patterned tiles in one zone (around the stove) and solids elsewhere. Metallic accents, gold, copper, or bronze tile, add glamour, especially paired with marble counters or dark cabinetry. Large-format tiles with bold graphic prints exist too, though be aware that very trendy patterns feel dated faster than classics.
Natural wood backsplashes and shiplap, once considered risky, now feel cozy and intentional, just seal properly and ensure ventilation is solid (moisture is wood’s enemy). Patterned wallpaper behind glass splash guards offers pattern without substrate concerns. For true boldness, combine multiple materials: tile accents, wood trim, and open shelving with decorative tile backing. Just keep one anchor (cabinetry color, countertop material) neutral so the backsplash reads as intentional, not chaotic.
Easy Installation Tips for DIY Projects
Before cutting or setting tile, prep your wall thoroughly. Remove outlet covers, ensure the surface is clean, level, and dry. Use a level and straightedge to check for dips or high spots: fill gouges with spackling compound and sand smooth. Measure twice, mark your starting point with a pencil, and use a laser level or chalk line to keep grout lines straight, this step separates pro results from amateur ones.
Invest in the right tools: a wet saw (rental ~$15/day) cuts ceramic cleanly, a notched trowel spreads adhesive evenly, and a grout float compacts and finishes joints. Safety essentials: wear safety glasses when cutting tile (shards fly), use a dust mask around dry grout, and glove up when handling chemicals.
For beginners, mastic (premixed tile adhesive) beats thin-set mortar, it’s forgiving and doesn’t require mixing. Small grout lines (1/8 inch to 1/4 inch) hide imperfections: wider lines show every wobble. Install spacers consistently and remove them before grout fully sets. After grouting, seal porous tile or grout within 72 hours to protect against stains. If this feels overwhelming, home renovation ideas examples walk through smaller projects first, or hire a tile specialist for complex patterns and cut-heavy layouts.
Choosing the Right Backsplash for Your Kitchen
Match your backsplash to your lifestyle and kitchen use. High-moisture zones (above sinks) need sealed, non-porous materials like glass, glazed ceramic, or sealed stone. Matte finishes hide water spots and fingerprints: glossy tile requires frequent wiping. If you love cooking and splatter is inevitable, consider dark colors or patterns that camouflage stains.
Consider cabinet and countertop colors. A backsplash should complement, not compete. Light tile brightens small kitchens: busy patterns work better in larger spaces with breathing room. If counters are bold, keep the backsplash quiet, and vice versa. Grout color matters too, light grout emphasizes individual tiles, while dark grout unifies the field and hides dirt.
Durability varies by material. Porcelain outlasts ceramic: sealed stone requires maintenance: glass is scratch-prone but utterly wipeable. Factor in your tolerance for upkeep. Budget also shapes decisions, tile remains the best value for durability and design range. Design inspiration sources like Houzz’s backsplash collection and sites like The Kitchn showcase real kitchens with actual lighting and wear, far better than Pinterest for assessing long-term appeal. Remodelista curates high-design options that age well. Study photos from kitchens 5+ years old to see which styles hold up visually.
Conclusion
A kitchen backsplash is both practical protection and design statement. Whether you choose timeless subway tile, bold patterns, or minimal modern finishes, the right backsplash transforms how your kitchen looks and feels. Honest assessment of your budget, lifestyle, and DIY comfort level matters more than following trends. Start with a small sample, live with it in your actual kitchen light, and take your time choosing. A backsplash you install this year will likely stick around for a decade or more, choose something you’ll genuinely enjoy seeing every morning.