Table of Contents
ToggleA large pantry is a rare luxury, but only if you’ve organized it well. Without a solid plan, even the biggest pantry becomes a chaotic pile where you can’t find the olive oil and discover expired spices shoved in the back. The good news? You don’t need a contractor or a complete overhaul. By using smart shelving, clear zones, vertical space, proper containers, and good lighting, you can transform your pantry into a space where everything has its place. This guide walks you through practical pantry ideas that actually work, with a focus on functionality over Instagram perfection. Whether you’re starting from scratch or fixing an existing mess, these strategies will help you create a pantry that saves time, reduces waste, and makes cooking easier.
Optimize Your Layout With Smart Shelving Solutions
Before you buy a single shelf, measure your pantry’s dimensions and think about what you’re storing. Most DIYers should start with adjustable shelving, it adapts as your needs change, and you won’t be locked into fixed heights that don’t fit your groceries. Standard pantry shelves are 12 to 18 inches deep: go deeper if you have the space, but anything past 18 inches makes items hard to reach at the back without a small step stool.
When installing shelves, don’t skimp on support. Use heavy-duty shelf brackets rated for at least 50 pounds per shelf. Dry goods, canned foods, and oils add up fast, a fully loaded shelf can easily exceed 100 pounds, especially in a large pantry. Anchor brackets securely into wall studs using 3-inch wood screws: if studs aren’t available, use heavy-duty toggle bolts or French cleats rated for your expected load. Building codes don’t regulate residential pantry shelving directly, but structural safety is non-negotiable.
Spacing matters too. Space shelves roughly 12 to 18 inches apart for cereal, snack boxes, and baking supplies. Go taller, 20 to 24 inches, for items in bulkier containers like bulk rice or flour. Leave at least 6 inches below the topmost shelf for ventilation and to avoid heat accumulation, especially if your pantry is near an oven or water heater. Adjustable systems let you fine-tune these heights without rebuilding.
Zone Your Pantry by Product Category
Dividing your pantry into zones, baking, canned goods, snacks, oils and condiments, grains, and spices, cuts search time and prevents duplicate purchases. Assign each zone a shelf or section and stick to it. This works because your brain learns where things live, and visitors (and family members) know where to find or return items without asking.
Start with a simple rule: like items stay together. All baking supplies (flour, sugar, baking powder, vanilla) go in one spot. Canned vegetables occupy a different shelf from canned sauces. Pasta, rice, and grains cluster on their own tier. Organizations and design experts recommend grouping by frequency of use as well, everyday staples at eye level, occasional baking supplies higher up, bulk items on lower shelves.
Within each zone, arrange smaller items so labels face outward. Taller jars go to the back: shorter ones in front so nothing gets lost behind. This visual hierarchy makes inventory counts easier and prevents you from buying duplicates of things you already have tucked away.
Maximize Vertical Space and Deep Storage
The real estate you’re not using is the space above your head. Large pantries with standard 8-foot ceilings waste hundreds of cubic feet of storage if you don’t go vertical. Add shelving all the way to 6 to 8 inches below the ceiling. You’ll need a small step ladder (not a ladder propped against walls, too risky) to access top shelves, but storing lightweight, infrequently used items up there (holiday baking pans, gift wrapping supplies, bulk water bottles) frees up prime real estate at arm’s reach.
For deep shelves, avoid the “mystery back” where items vanish. Use tiered shelf risers or small risers, essentially mini risers that sit on your shelf and create a stepped appearance, so you can see everything without reaching blind into the darkness. Another tactic: rotate items forward as you use them, pushing new stock to the back. This simple “first in, first out” rule prevents expiration disasters.
Don’t overlook the inside of pantry doors. Narrow, hanging over-the-door organizers with small pockets work for spices, packets, and small jars. Use adhesive-backed hooks for reusable shopping bags. Just keep door storage light, anything heavier than a few pounds puts stress on hinges over time. Kitchen design and organization experts often suggest using door space for items you grab frequently so you’re not hunting into the depths every time.
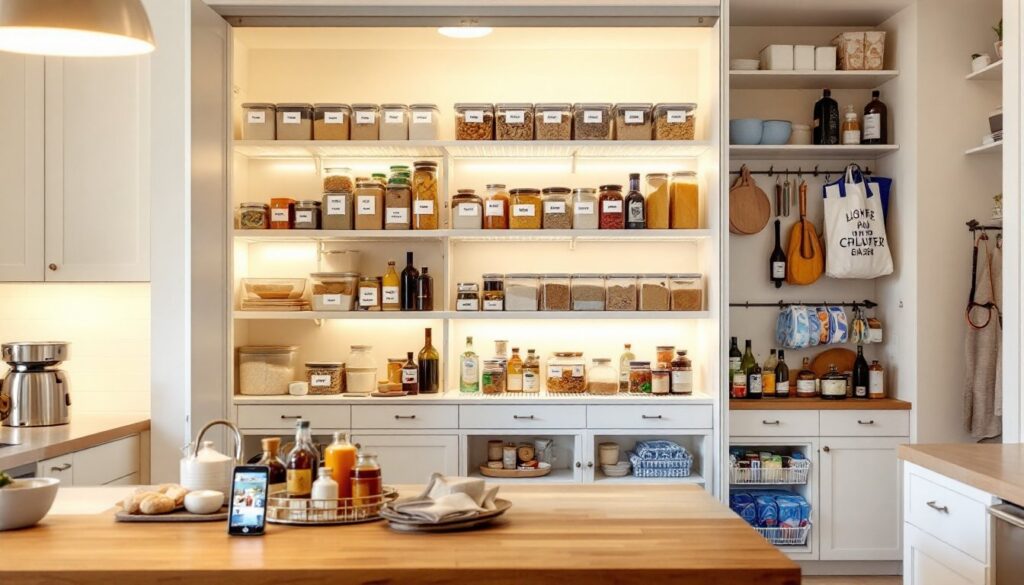
Implement Clear Storage Containers and Labeling Systems
Opened cereal boxes and partially full flour bags make a pantry look sloppy and invite pest problems and staleness. Airtight clear plastic containers or glass jars change everything. You can see what you have, how much remains, and when you need to restock, no guesswork. Standard sizes are 2-quart, 3-quart, and 5-quart containers: start with a few and expand as you shift more items over.
When buying containers, prioritize BPA-free plastic or tempered glass. Check that lids seal tightly (they should give a slight resistance when closing). Invest in containers with stackable designs so they nestle neatly on shelves without waste. A set of matching containers looks cleaner and takes up less brain energy than a hodgepodge of mismatched jars.
Labeling is the glue that holds organization together. Use a label maker (even a basic handheld one costs $15–30) or waterproof sticky labels and a marker. Write the item name and the purchase or expiration date. This takes 30 seconds per container and saves headaches later. Label shelves and zones too, especially if multiple people use the pantry. A small sign reading “Baking Supplies” or “Canned Vegetables” keeps everyone on the same page and makes restocking intuitive.
Add Lighting and Accessibility Features
A dark pantry defeats organization. Even well-labeled containers and zones won’t help if you can’t see them clearly. Install LED strip lights under shelves or an overhead fixture inside the pantry. Motion-sensor lights are a nice touch, they turn on when you open the door and off automatically after a few minutes, saving energy. LED bulbs last years, stay cool, and don’t waste heat in a space packed with food.
Accessibility matters more than aesthetics. If your pantry has a narrow door, consider replacing it with a wider bifold door (requires simple hinges and a few hours of work). This gives you better sightlines and makes loading/unloading easier, especially in a large pantry. A small pull-down ladder or stool stays inside or leans against a nearby wall so reaching top shelves is safe and stable.
If you have children or elderly family members, place everyday items (breakfast cereals, snacks, water bottles) on middle shelves, not bottom, where you have to squat, and not top, where climbing is risky. A lazy Susan (rotating tray) tucked on a middle shelf holds bottles and condiments within easy reach and spin-access. These small touches make the pantry work harder for everyone in your household without sacrificing organization.
Maintain Your Organized Pantry With Simple Habits
Organization falls apart without upkeep. Set aside 15 minutes every month to take inventory, check expiration dates, and tidy shelf edges. Remove any items that are stale, expired, or damaged. This habit prevents waste, catches pest problems early, and keeps your mental map of what’s where accurate.
Adopt a “one in, one out” rule for non-essentials and a “buy from the back” rule for rotation. When you stock new items, place them behind older stock on the shelf. Use a permanent marker to write the date on items with no printed expiration (flour, sugar, oils) so you know how long they’ve been stored. Most baking staples stay fresh 6 to 12 months in cool, dry conditions: oils last longer if sealed and kept away from direct heat or light.
Final tip: home and seasonal organizing guides emphasize the power of a quick visual scan before shopping. Check your pantry, snap a photo on your phone, and reference it at the store. You’ll stop overbuy things you forgot you had and avoid impulse buys that clutter shelves. A well-organized pantry isn’t a one-time project, it’s a system that evolves with your cooking habits and family needs.
Conclusion
A large pantry is powerful only when it’s organized. Start with smart shelving and zones, then add clear containers and labels. Layer in good lighting and accessibility features. Most importantly, invest five minutes daily and fifteen minutes monthly to keep it running smoothly. The payoff? Less time hunting for ingredients, fewer wasted groceries, and a pantry that actually works like you planned. Get started this weekend, your cooking routine will thank you.