Table of Contents
ToggleReplacing flooring is one of the fastest ways to refresh a home’s look, but it’s also one of the most expensive renovations. A new hardwood floor can cost $8–15 per square foot installed, while luxury vinyl plank flooring runs $2–5 per square foot. The good news? Homeowners don’t need to choose between a tight budget and stylish, durable floors anymore. In 2026, inexpensive flooring options have come a long way, laminate, vinyl, concrete, and budget tile now deliver aesthetics and longevity that rival pricier alternatives. This guide walks you through the best affordable flooring solutions, how to install them yourself to save labor costs, and which option works best for different rooms and lifestyles.
Key Takeaways
- Inexpensive flooring options like laminate, vinyl plank, tile, and concrete now rival premium alternatives in durability and aesthetics, with costs ranging from $0.30–$5 per square foot.
- DIY installation of budget flooring can save $1,000+ on a 1,000 square-foot project by eliminating labor costs, which typically account for 50% of total flooring expenses.
- Vinyl plank is the most versatile inexpensive flooring choice, working in wet areas like kitchens and bathrooms while remaining waterproof and forgiving to install.
- Proper subfloor preparation, material acclimation for 48 hours, and following manufacturer-specific installation guidelines prevent costly mistakes like buckling, gaps, and voided warranties.
- Laminate suits dry spaces like bedrooms and hallways with a 10–15 year lifespan, while tile and polished concrete are best for moisture-prone areas with longevity of 20+ years.
Laminate Flooring: Durability Meets Affordability
Laminate flooring costs $0.50–$2.50 per square foot for materials, making it one of the cheapest options on the market. It’s constructed with four layers: a backing layer (usually high-density fiberboard), a core plywood layer, a photographic layer that mimics wood or stone, and a protective wear layer. That top layer is key, it’s what keeps your floor looking good for 10–15 years under normal foot traffic.
Laminate handles moisture poorly, so skip it for bathrooms and kitchens where spills are constant. It’s ideal for living rooms, bedrooms, and hallways. Installation involves clicking planks together (no nails or glue required on most modern products), which makes it genuinely DIY-friendly. Hand protection and eye protection matter when cutting planks with a miter saw, wear gloves and safety glasses. Acclimate the flooring to your home for 48 hours before installation: laminate expands and contracts with humidity changes, and skipping this step causes buckling or gaps.
One real limitation: you can’t refinish laminate like hardwood. If the wear layer gets damaged, you’re replacing the plank, not sanding and staining it. But the cost of materials is so low that replacing a few planks is still cheaper than refinishing genuine hardwood.
Vinyl Plank Flooring: The Modern Renter’s Dream
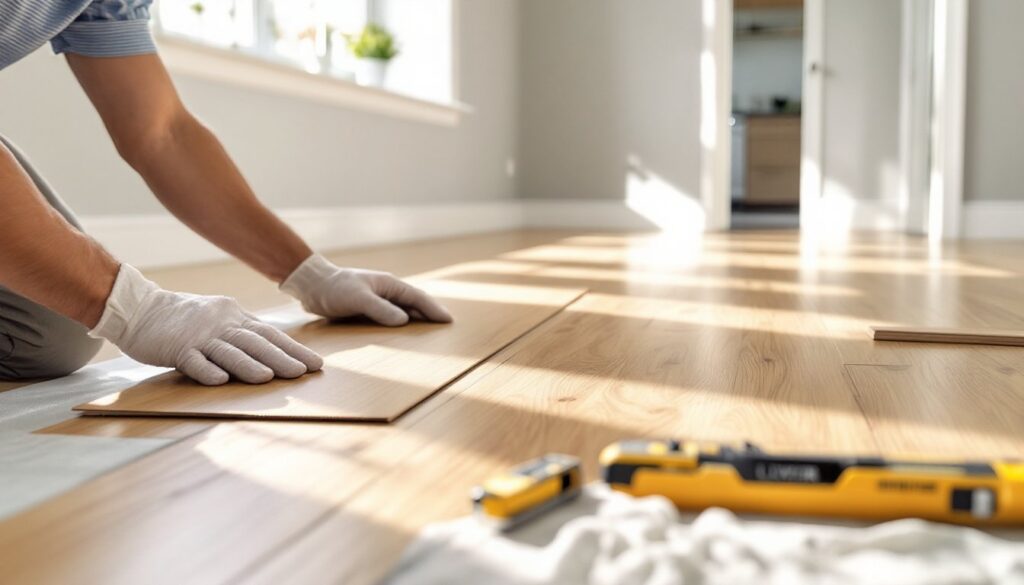
Luxury vinyl plank (LVP) and rigid core vinyl plank (RVP) have essentially replaced laminate in the budget-flooring conversation. Prices range from $1.50–$4 per square foot. The material is more forgiving than laminate: it’s waterproof, so it works in kitchens and bathrooms. It’s softer underfoot, quieter to walk on, and doesn’t require underlayment in most cases.
Vinyl comes in two main formats: click-together planks (easiest for DIY) and glue-down sheets (slower but great for larger areas). Most homeowners prefer the click-together version, no adhesive mess, no special tools beyond a handsaw or miter saw, and reversible if you ever need to replace a section. Wear cut-resistant gloves and eye protection when trimming. Rigid core vinyl (often called “SPC” or stone-plastic composite) is stiffer and better for kitchens: standard LVP is more flexible and warmer.
The installation is straightforward enough that many renters install it themselves and take it when they move. 2025 vinyl flooring installation costs break down to $2–$5 per square foot for labor alone, so DIY savings are substantial. Like laminate, vinyl needs room acclimation and flat subfloors, bumps under the planks create telegraphing (visible ridges on the surface).
Tile Flooring on a Budget
Ceramic or porcelain tile can be incredibly cheap, $0.50–$2 per square foot for basic styles, but the total project cost climbs fast because of grout, thin-set mortar, underlayment, and labor if you don’t DIY. Budget tile is heavier and more brittle than premium tile, so breakage rates during cutting are higher. Expect to buy 5–10% extra to account for waste.
Budget tiles work best in kitchens, bathrooms, and entryways where moisture and heavy traffic are the norm. They’re durable for 20+ years if installed properly. The downside: cold underfoot, noisy when you drop things, and grout lines trap crumbs and dirt, more maintenance than laminate or vinyl.
If you’re tiling for the first time, budget tile is actually decent practice material because mistakes are less costly. Use a wet saw (rent one for $20–$40 per day) to cut tiles cleanly and avoid hand tool accidents. Wear a dust mask during cutting (silica dust is a respiratory hazard), safety glasses, and work gloves. Laying tile requires patience with layout and a straightedge: rushing leads to uneven grout lines that look amateur. Many DIYers hire a pro for tile-heavy projects and pocket labor savings elsewhere.
Polished Concrete: Industrial Style Without the Price Tag
Polished concrete sounds like a luxury finish, and it is, aesthetically, but if your home already has a concrete slab (no wood subfloor), the cost is minimal. A basic polish runs $1–$3 per square foot if you hire a professional, or $0.30–$0.50 per square foot in materials if you rent a concrete grinder and do it yourself.
This option is best for basements, garages, or homes with a concrete foundation poured directly below living spaces. It’s not realistic for homes with wood frame construction above a crawlspace unless you’re willing to remove the existing floor first.
The DIY route requires renting a concrete floor grinder and grit pads (start with 30-grit, progress to 120-grit for a glossy finish). It’s labor-intensive, dusty, and a second pair of hands is essential to manage the equipment safely. Wear a heavy-duty dust mask (N100 rated), ear protection, and safety glasses, grinding concrete generates a lot of noise and clouds of silica dust. Seal the finished concrete with a penetrating sealer to protect against stains. Small space design and budget makeovers often showcase polished concrete as a trend-forward, affordable option for modern interiors.
DIY Installation Tips to Save Labor Costs
Labor is often 50% of the total flooring cost. Installing budget flooring yourself can save $1,000+ on a 1,000 square-foot project. Here’s how to avoid rookie mistakes:
Prep the subfloor. This is non-negotiable. Sweep, vacuum, and fill gaps or low spots with floor leveler. Wood subfloors must be acclimated indoors for 48 hours minimum. Use a straightedge to check for humps or valleys, anything over 1/8 inch in 10 feet causes deflection and voided warranties.
Measure twice, cut once. Sketch a layout before cutting anything. For laminate and vinyl, start in the center of the room and work outward to avoid narrow strips at the edges, they look wrong and are harder to fit. Pre-cut all planks for a room before installing: it’s faster and reduces mess.
Use the right tools. A miter saw gives cleaner cuts than a handsaw and saves your shoulders. A circular saw works if it’s all you have. Rent if you don’t own, $20–$40 per day beats buying a $200 tool for one project. Knee pads aren’t luxury: they’re essential if you’re installing on hard surfaces.
Acclimate materials. Don’t skip this. Laminate and vinyl expand and contract: concrete and tile absorb moisture. Leave materials in the room (sealed in packaging) for 48 hours before use. This prevents buckling, gaps, or lippage (height differences between adjacent tiles).
Watch online tutorials for your specific product. Laminate click systems vary: vinyl too. Manufacturers post installation videos, follow them exactly.
Comparison: Which Budget Flooring Works Best for Your Space
Choosing the right flooring depends on room function, moisture exposure, and aesthetic goals. Here’s a quick breakdown:
Laminate: Best for living rooms, bedrooms, and hallways where it’s dry and traffic is moderate. Avoids moisture entirely, don’t install in kitchens or bathrooms. Cost: $1–$3 per sq. ft. installed (DIY). Lifespan: 10–15 years.
Vinyl Plank: Works anywhere, kitchens, bathrooms, basements, living spaces. Waterproof and forgiving. Best value for homes with kids or pets: scratches are less visible. Cost: $2–$5 per sq. ft. installed (DIY). Lifespan: 15–20 years.
Tile: Ideal for kitchens, bathrooms, mudrooms, and entryways. Extremely durable but cold, noisy, and grout maintenance is ongoing. Cost: $2–$5 per sq. ft. installed (DIY). Lifespan: 20+ years.
Polished Concrete: Works only if you have a concrete subfloor. Perfect for basements, garages, or modern minimalist aesthetics. Cost: $0.30–$0.50 per sq. ft. (DIY): $1–$3 (hired). Lifespan: Indefinite with sealing maintenance.
Budget home renovation stories and DIY guides frequently compare these options in real-world installations, showing before-and-afters that help homeowners visualize fit for their spaces. Your choice eventually depends on answering three questions: Is the area wet or dry? How much traffic? What aesthetic appeals to you? Answer those, and the right flooring becomes obvious.
Conclusion
Budget flooring in 2026 isn’t a compromise anymore, it’s a smart strategy. Laminate, vinyl plank, tile, and concrete all deliver durability and style for a fraction of hardwood or stone costs. The real money-saver is doing the installation yourself and investing that time in prep work, measurement, and following manufacturer guidelines. Pick the material that fits your room’s moisture level and traffic, acclimate it properly, and you’ll have floors that look fresh and perform reliably for over a decade.