Table of Contents
ToggleA kitchen bar doesn’t require sprawling square footage. For homeowners and renters with compact kitchens, a well-designed bar becomes a game-changer: it adds seating, defines the space, and creates a natural gathering point without eating up precious floor real estate. Kitchen bar ideas for small spaces need to be strategic, but they’re far from impossible. The key is understanding what your layout can handle, choosing the right configuration, and maximizing every function. Whether you’ve got a galley kitchen, an open-plan nook, or just a few extra feet of counter space, there’s a solution here that works for your footprint.
Key Takeaways
- Kitchen bar ideas for small spaces must align with your layout, traffic flow, and daily usage—measure twice and define your goals before building or purchasing.
- Peninsulas (12–15 inches deep) and wall-mounted fold-down bars are the most space-efficient configurations for compact kitchens without sacrificing functionality.
- Layer multiple functions into your bar design by incorporating open shelving, prep surfaces, and beverage coolers to maximize storage and usability without added bulk.
- Choose a bar height of 36 inches with stools at 24–26 inches, ensure secure wall anchors rated for 500+ pounds per mounting point, and add lighting and backsplash to define the space.
- Styling details like pendants, coordinated colors, open shelving displays, and organized storage transform a bar from cramped to intentional and welcoming.
- Mobile bar carts paired with wall-mounted counters offer flexibility for renters and those who need temporary solutions without permanent construction.
Understand Your Space and Set Goals
Before drawing anything up or shopping for bar stools, spend time measuring and thinking about how you actually use your kitchen. Walk through it during dinner prep, morning coffee, and when guests visit. Take three measurements: the length and depth of available wall or counter space, the ceiling height (critical for overhead clearance and ventilation), and the traffic flow, how many people move through the space simultaneously and in which directions?
Next, ask yourself what the bar needs to accomplish. Is it primarily a casual seating spot for your family? A work-from-home station where you need desk space? A place to set drinks during entertaining? A breakfast nook replacement? Each goal changes what you build. A dedicated dining bar might be 36 inches deep and 42 inches high: a workspace bar needs more depth and different lighting. A quick snack counter can be leaner.
Jot down non-negotiables. Do you need storage underneath? Electrical outlets nearby for a coffee maker or laptop charger? Adequate sightlines into the main living area? Make these decisions now, and you’ll avoid half-finished projects that don’t fit the way you live.
Peninsula and Island Bar Configurations
Narrow Peninsulas for Linear Kitchens
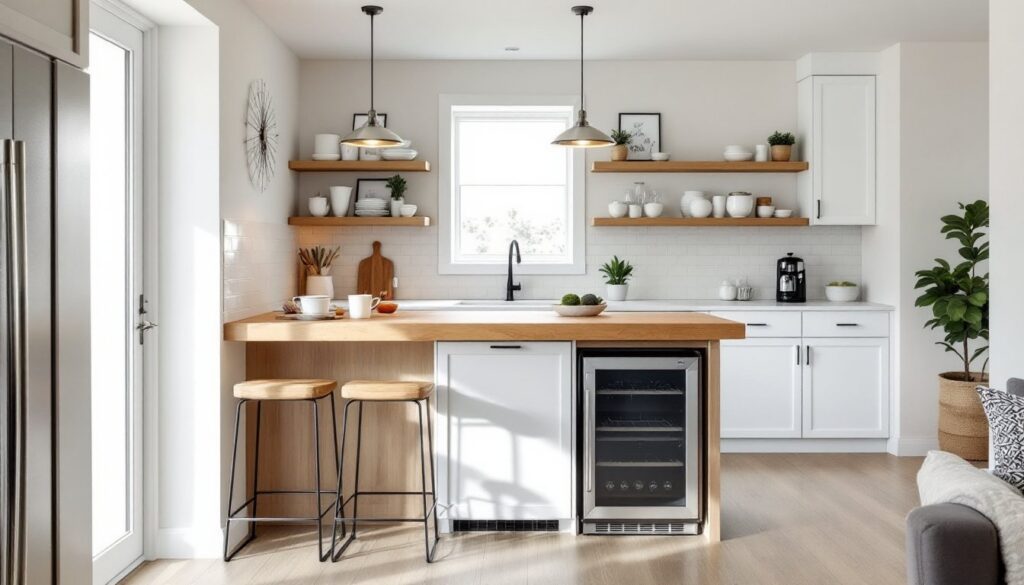
A peninsula, a counter extending from a wall or existing cabinetry, is the most space-efficient bar setup for tight kitchens. It creates a defined bar area without the footprint of a full island. For small spaces, aim for a peninsula that’s 12–15 inches deep and extends 3–4 feet along the wall. This depth is enough for two bar stools and functional seating without blocking access to cabinets or appliances on the far side.
When building a peninsula, anchor it to existing cabinetry or a wall. If you’re working in a rental or want something removable, freestanding bar islands (24–30 inches deep, lightweight, with concealed hardware) are worth exploring. Standard bar height is 36 inches for the work surface: seating height (the stool) is typically 24–26 inches. If you want dining-height seating (to eat actual meals), that’s 30–36 inches high, and the overhang needs to accommodate legs, usually 15 inches minimum under the counter.
Small peninsulas work beautifully in galley kitchens or L-shaped layouts where one wall has unused space. Material-wise, a solid surface (laminate, quartz, butcher block) is durable and affordable: reclaimed wood or live-edge slabs add character but require sealing and maintenance. Keep the color and material consistent with existing cabinetry to make the space feel intentional, not awkwardly tacked on.
Wall-Mounted and Compact Bar Solutions
Fold-Down and Drop-Leaf Designs
If you’ve got 2–3 feet of wall space and limited floor footprint, a wall-mounted bar is your answer. These fold down when not in use and disappear entirely, freeing up the space for movement or other activities.
A fold-down bar mounts horizontally on the wall (at bar height, around 36 inches) using heavy-duty hinges rated for the weight you’ll place on it. When closed, it’s flat against the wall, taking up maybe 12 inches of depth. Open, it extends 15–18 inches and sits on fold-out legs. Material options include solid wood (pine, oak, or maple, typically 1.5 inches thick for stability), MDF (cheaper, lighter, but less durable), or manufactured panels with laminate tops. You’ll need a stud finder and lag bolts or heavy-duty wall anchors: if your wall is drywall only (no stud backing), the bar will fail when someone leans on it.
A drop-leaf bar works similarly but has a hinged top that folds up vertically, like an old-fashioned secretary desk. These are great if you want even less visual clutter when closed. Both styles can include fold-out stools attached to the underside, so nothing else takes up floor space.
For these installations, load-bearing matters. A bar supporting two adults drinking coffee is roughly 300–400 pounds total load. Use bolts rated for at least 500 pounds per mounting point, and space your mounts 16–24 inches apart along studs. Drywall alone won’t cut it.
Multi-Functional Bar Features That Save Space
The best kitchen bar ideas for small spaces layer functions. Instead of a bar that’s just seating, build one that also solves storage, prep work, and serving.
Incorporate open shelving below the seating overhang. This gives you storage for glasses, barware, cookbooks, or small appliances without adding bulk. Floating shelves are easier to install than a full cabinet base, and they visually lighten the space. If you go with closed cabinetry, use glass fronts on at least some doors so the bar doesn’t feel like a solid wall dividing your kitchen.
Integrated prep surfaces work too. A bar with a slightly recessed area at one end becomes an informal serving station: you can set down a cutting board, prep snacks, or stage drinks. Mount a small wine cooler or beverage fridge underneath if you entertain frequently. These compact units (18–24 inches wide) slide under the bar overhang and don’t steal counter space from your main kitchen.
For storage-heavy situations, consider a bar cart instead of a fixed structure. It’s mobile, so you move it into the kitchen for entertaining and tuck it away other times. Pair it with tall bar stools tucked under a small wall-mounted counter, and you’ve got flexibility without permanent construction. Look for carts with at least two tiers and a solid frame, flimsy ones wobble when someone leans on them. Check the weight rating: most bar carts handle 100–150 pounds per shelf, but verify before loading.
Add electrical outlets nearby for a coffee maker, blender, or laptop charger. This requires running new circuits if your kitchen’s existing outlets are fully loaded. Call a licensed electrician: this isn’t a DIY task if you’re unsure of your panel’s capacity or local codes. Running surface-mounted wiring along the wall is an option if you can’t safely add hard-wired outlets, but it’s not pretty.
Styling and Storage Tips for Bar Areas
Once the structure is in place, styling and storage decisions make or break the look and functionality.
Lighting is critical. A bar that’s dimly lit reads as cramped: overhead pendants or a small under-cabinet LED strip brighten the space and make the bar feel like a deliberate design feature, not an afterthought. Install pendants 12–15 inches above the bar surface on a dimmer so you can adjust ambiance. If you’re renting, peel-and-stick LED strips are your friend: they plug in and add a polished glow without rewiring.
Stools and seating are foundational. For a 36-inch-high bar, choose stools with a 24–26-inch seat height. Material matters for durability and cleaning: upholstered stools hide stains but absorb spills: plastic or metal is easier to wipe down but less comfortable for extended sitting. Look for footrests, which reduce strain on legs if people sit for more than 20 minutes. For super-tight spaces, use backless stools or swivel styles that tuck fully under the overhang.
Display and storage work together. Open shelving lets you show off glassware, ceramics, or a small plant collection, but clutter reads as cramped. Stick to a color palette, natural wood, white, or matte black, and keep the visual noise minimal. Behind or beside the bar, hang a floating shelf for cookbooks or barware. A pegboard wall nearby gives you hooks for utensils and glasses without floor footprint. Use baskets or bins under the bar for less-photogenic items: napkins, coasters, cleaning supplies.
Consider a backsplash. Tile, shiplap, or even peel-and-stick wallpaper behind the bar defines it as a distinct zone and protects the wall from splashes. Subway tile (3×6 inches) is classic and easy to clean: larger format tiles (12×24 inches) feel more modern and have fewer grout lines. If you’re installing this yourself, watch your grout consistency, too thick and it cracks: too thin and it slides out. Rent a grout float from the big-box store: a putty knife will drive you nuts and result in messy lines.
<h2 id="” data-id=””>Conclusion
Kitchen bar ideas for small spaces succeed when they’re built to your layout, not imposed on it. Start by measuring, thinking about how you’ll use the space, and choosing a configuration that fits: peninsula, island, wall-mounted, or cart-based. Then layer in function with smart storage, good lighting, and seating that’s actually comfortable. The bar isn’t a luxury in a small kitchen, it’s a way to claim more usable space and create a focal point for entertaining and everyday living. Take your time with installation, don’t skip the structural anchors, and the payoff is a kitchen that finally feels like it works for you.