Table of Contents
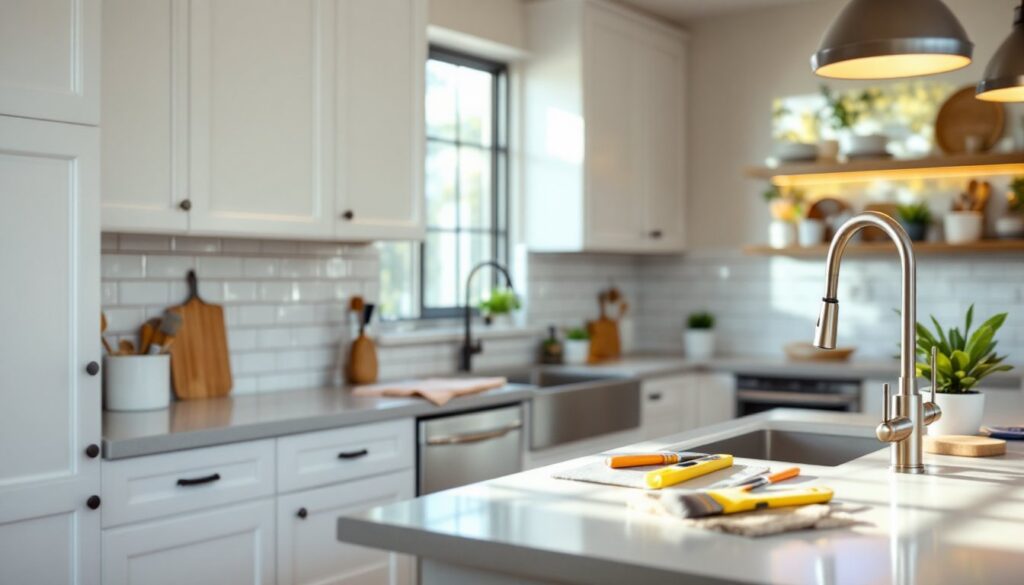
ToggleA kitchen remodel doesn’t have to drain your savings or require months of chaos. Whether you’re refreshing cabinets, upgrading fixtures, or rethinking your layout, strategic updates deliver real impact without gut-renovation costs. The best kitchen ideas focus on high-visibility changes that boost both functionality and resale value. This guide walks you through seven practical, budget-conscious approaches to transform your space. You’ll learn which projects offer the strongest return on investment, what tools and materials work best, and when to call in a professional. Let’s dig in.
Key Takeaways
- Cabinet refacing and fresh hardware are among the fastest ROI kitchen ideas, delivering visual impact for under $200 in materials and minimal labor investment.
- Under-cabinet LED lighting and pendant fixtures transform both functionality and mood, costing between $20–$400 per fixture and dramatically improving work zones.
- Backsplash installation with peel-and-stick or ceramic tiles can be completed in a weekend by DIYers, offering a budget-friendly way to update kitchen aesthetics without touching countertops.
- Paint preparation—including TSP cleaning, sanding, and priming—is non-negotiable for lasting results; invest in premium paint brands to avoid multiple coats and ensure kitchen-grade durability.
- Vinyl plank flooring with click-lock systems is DIY-friendly and waterproof, costing $1–$4 per square foot and eliminating expensive labor fees for budget-conscious homeowners.
- Maximize existing storage before replacing cabinets by adding floating shelves, pull-out organizers, and wall-mounted solutions at a fraction of full kitchen remodel costs.
Cabinet and Hardware Upgrades
Cabinet refacing or repainting ranks among the fastest ROI kitchen updates. Instead of replacing cabinetry, a major expense, you strip, sand, prime, and paint existing frames. Solid wood cabinets take paint well: laminate or veneer cabinets need a bonding primer like Zinsser Bulls Eye 1-2-3 to prevent peeling.
Materials and tools needed:
- 120, 150, and 220-grit sandpaper
- Bonding primer (for laminate cabinets)
- High-quality cabinet paint (semi-gloss or satin finish)
- Paintbrushes, foam rollers, drop cloths
- Screwdriver and label maker (for hardware)
- Safety glasses, gloves, and dust mask
Step-by-step process:
- Remove cabinet doors and hardware: label everything with painter’s tape and a marker
- Clean surfaces with TSP (trisodium phosphate) or degreaser
- Sand thoroughly, this is not optional. Paint bonds to sanded surfaces, not glossy ones
- Apply bonding primer if cabinets are laminate or have a factory finish
- Apply two coats of cabinet paint, sanding lightly between coats
- Install new hardware while doors dry
New hardware alone refreshes cabinet aesthetics. Modern pulls and knobs in brushed nickel, matte black, or brass cost $3–$15 per piece and take five minutes to install. This small detail signals design intention and costs under $200 for a full kitchen.
For deeper wear or water damage, cabinet replacement becomes necessary. Stock cabinets from retailers cost $3,000–$8,000 installed: semi-custom runs $8,000–$15,000. Budget-conscious DIYers often install stock cabinetry themselves to save labor costs, though plumbing integration and cabinet leveling require precision.
Countertop and Backsplash Transformations
Countertops anchor the kitchen’s visual weight, so upgrading them creates immediate impact. Laminate countertops remain budget-friendly at $25–$50 per linear foot installed: solid surface like Corian runs $50–$100: quartz costs $75–$150. Recycled glass or engineered quartz appeal to eco-conscious homeowners and fall in the mid-to-premium range.
If your current counters are functional but dated, consider a backsplash first. A four-foot-tall backsplash transforms the wall space above counters without touching the counters themselves. Peel-and-stick tiles ($15–$30 per sheet) offer temporary style: ceramic subway tile ($5–$10 per square foot) provides durability and timeless appeal.
For DIY tile installation:
- Plan the layout to center columns and minimize cut tiles
- Use a notched trowel (typically 3/16″ for wall tile) to apply thin-set mortar
- Space tiles consistently with cross-shaped spacers (1/8″ to 3/16″)
- Grout after 24 hours: seal natural stone grout after curing
- Caulk (not grout) the seams where backsplash meets countertop and corners, grout cracks here with seasonal movement
Kitchen design ideas showcase countless backsplash patterns, from geometric mosaics to classic white subway. A skilled DIYer can tile a 40–60 square foot backsplash in a weekend. If grout work intimidates you, hire a tile specialist for grouting only, you’ll handle demo and installation yourself.
For countertops, laminate refinishing products exist but rarely look premium long-term. If budget allows, save and invest in solid surface or quartz: their durability justifies the cost over 10+ years.
Lighting and Fixture Improvements
Lighting transforms both function and mood. Many older kitchens rely on a single overhead fixture, creating shadows over work zones and eating areas. Adding under-cabinet lighting and pendant fixtures requires modest investment but yields dramatic results.
Under-cabinet LED strips:
- Adhesive-backed LED strips mount directly to cabinet undersides
- Cost: $20–$60 per kit (covers 10–16 linear feet)
- Plug-in versions avoid hardwiring: hardwired versions integrate cleanly into cabinetry
- Choose warm white (2700K) for ambient feel: cool white (4000K) for task lighting
Pendant lights over islands or breakfast bars:
- Replace existing flush-mount fixtures for $100–$400 per fixture installed
- If no existing electrical box exists, hardwiring requires a licensed electrician (typically $200–$400 labor)
- Battery-operated pendant options avoid electrical work but limit longevity and brightness
Swapping out a faucet is straightforward for confident DIYers: replacing light fixtures involves shutting off breakers, testing for live current with a multimeter, and disconnecting wiring. If you’re unfamiliar with electrical work, hire an electrician, it’s not worth electrocution risk.
Sink faucets ($80–$300) swap in under an hour if you’re replacing like-for-like. Curved gooseneck or pull-down spout styles work better in smaller kitchens than tall, stationary fixtures. Choose brass or stainless finishes: chrome looks cheap quickly. The faucet is one of the most-touched elements in a kitchen, so pick durable construction.
Paint and Color Scheme Changes
Paint is the cheapest transformation in your toolkit. A gallon of quality kitchen paint costs $40–$70 and covers roughly 350 square feet per coat. Accent walls, trim work, or full coverage each cost differently but start under $150 in materials.
Preparation is non-negotiable:
- Wash all surfaces with TSP to remove grease and grime
- Sand gloss or semi-gloss finishes lightly (120-grit) so primer grips
- Prime any repairs, stains, or raw drywall with bonding primer
- Use painter’s tape on trim, appliances, and backsplash edges
- Lay drop cloths, kitchen paint spatters hide poorly under island overhangs
For kitchen walls, choose eggshell or satin finishes: they resist moisture and clean easier than flat paint. Matte black or deep navy paired with crisp white trim and subway backsplash feels modern. Soft sage, warm cream, or pale gray suit traditional and transitional styles.
Best Home Renovation Ideas suggest painting cabinets in soft neutrals while contrasting trim and walls. This layered approach adds depth without chaos.
Don’t skimp on paint quality. Budget-brand paint often requires three coats: premium paint (Benjamin Moore, Sherwin-Williams Pro Classic, Farrow & Ball) covers better and resists staining. For kitchens, semi-gloss cabinet paint and satin wall paint are workhorses.
Flooring Options and Installation
Kitchen flooring endures spills, foot traffic, and temperature swings. Existing tile, vinyl, or laminate stays serviceable if sealed and clean, but replacing it opens design options.
Common budget-friendly choices:
- Vinyl plank (LVP): $1–$4 per square foot, waterproof, DIY-friendly with click-lock systems
- Ceramic or porcelain tile: $2–$10 per square foot, durable, cold underfoot
- Polished concrete: $5–$15 per square foot sealed, industrial feel, slippery when wet
- Engineered hardwood: $3–$10 per square foot, warmer than tile, moisture-sensitive
Vinyl plank flooring (with click-locking, not glue-down) suits DIYers. Remove old flooring, vacuum thoroughly, and ensure subfloors are flat to 3/16″ over 10 feet. Acclimate planks indoors 48 hours before installation. Lay rows at a slight angle (8–10 degrees) for visual interest: stagger seams by at least 6 inches.
Tile installation requires trowel work, spacers, and grouting. If new to tile, a 100-square-foot kitchen floor is manageable but demands patience. Slopes toward a floor drain prevent standing water: most DIY kitchens use 1/8″ spacers and sanded grout.
Kitchen design articles often highlight waterproof underlayment, essential under tile in high-moisture areas. Moisture barriers prevent subfloor rot and mold.
Labor costs for professional flooring installation range $3–$8 per square foot. A 100-square-foot kitchen costs $300–$800 in labor alone, making DIY appealing if you’re comfortable with precision and patience.
Storage Solutions and Layout Optimization
Kitchen storage often limits functionality more than budget. Before ripping out cabinets, maximize existing space with thoughtful additions and organization.
Quick wins:
- Wall-mounted magnetic strips for knives ($15–$30)
- Floating shelves above lower cabinets ($50–$150 installed)
- Pull-out organizers, spice racks, and utensil dividers ($20–$80 each)
- Vertical plate racks and pan organizers ($30–$100)
- Under-sink sliding drawers and cabinet organizers ($40–$80)
If layout feels cramped, measure the work triangle: the path between sink, stove, and refrigerator. Ideal distances are 4–9 feet between each point. If cabinets block sightlines or the stove sits too close to a wall, repositioning appliances requires plumbing, electrical, and gas line work, call a professional.
Small layout fixes include relocating the trash bin outside the main work zone or moving a microwave to a dedicated shelf rather than countertop. These cost $0–$200 but reclaim usable prep space.
Open shelving appeals aesthetically but demands organized, attractive dishware. Install shelves at 15 inches apart (comfortable reach between shelves). Use a level and stud finder: shelves over 24 inches wide need bracket support every 16 inches. Floating shelf brackets cost $30–$80 each: open shelving without support creates safety hazards.
Home Renovation Ideas and Techniques highlight pantry organization, often overlooked but critical. Deep shelving wastes space if items hide in back. Tiered shelves, clear containers, and labels cost $40–$100 and transform usability.
Conclusion
The most successful kitchen remodels combine high-impact, budget-conscious updates with realistic expectations about what you can DIY. Paint cabinets, upgrade hardware, add lighting, and refresh the backsplash, these projects yield strong returns without professional contractors. Reserve your budget for items like countertops and flooring, where durability and finish quality matter long-term. Take your time with prep work, invest in decent tools, and don’t hesitate to hire specialists for electrical, plumbing, or tile work outside your skill level. A thoughtfully updated kitchen works harder and feels newer without maxing out your credit card.